Sometimes customers want to reserve a product before they’re ready to take it home, or before it even arrives at your store. With Product Pick-Ups, you can easily handle layaways, pre-sales, and partial payments while keeping everything organized in your system. The Grindless Point of Sale allows you to ring up a sale, set a target date when the customer is going to return, and see a list of all products owed to customers with the ability to notify them right from the POS.
This is also a handy tool for doing special orders with customers. If a customer asks for an item you don’t typically carry, but you want to special order it for them, you can create a new product in the system and do a pre-sale to the customer for that product. Later, once you’ve ordered it and it arrives, you can use the same procedure for tracking and notifying the customer when it’s ready.
Start a Pick-Up Order
Creating a pick-up order is simple. Start a sale under the customer’s name, the same way you would for any normal sale. Add the items they want, and, and collect a partial payment toward their total.
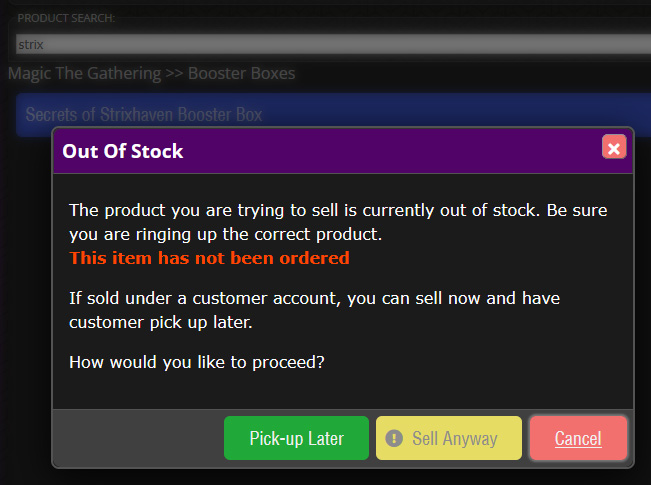
If the product doesn’t have any stock yet, you the system will prompt you to confirm your choice. You have two options:
- Pick-Up Later: The customer will pick-up the product later once it is available. This is the option you’ll want to choose for pre-orders!
- Sell Anyway: Used for instances where you’re selling something you have in your store but inventory levels are, for some reason, not accurate.
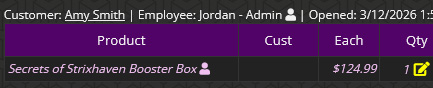
After choosing Pick-up Later, the product will be added to the order and will appear as italicized to differentiate it against other items in the order.
If your store requires minimum amount as a deposit, the system will tell you how much is due as a down payment.
Hint: The required deposit amount can be configured in Settings → Sales Settings, allowing you to enforce rules like a 10% deposit or a minimum order value.
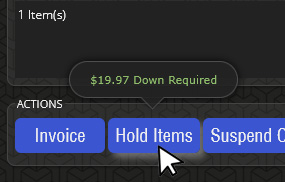
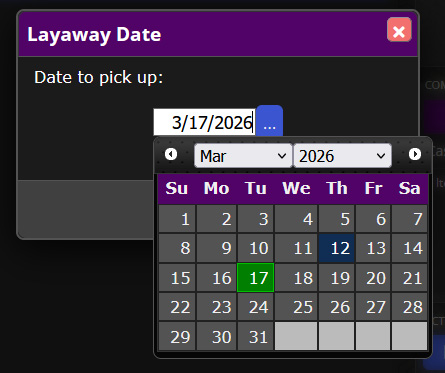
Once you’ve tendered enough payments towards the order to cover the deposit, you’ll be able to click Hold Items and choose a date that the customer intends on coming back to pick up their item(s).
After that, you’ll be able to print a receipt to give to the customer, confirming their pick-up. It’s just that easy.
Track All Held Items in One Place
Need to see what products are ready and waiting for customers to come pick them up?
Head to Reports > Items to Pick Up to view a complete list of all held orders.
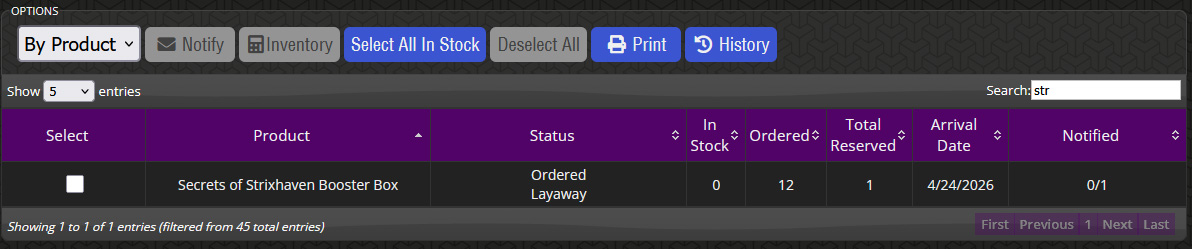
From this screen you can:
- See which items are owed and to whom
- Track the target pickup dates
- Quickly notify customers when their order is ready
This makes it easy to stay organized and ensure nothing slips through the cracks.
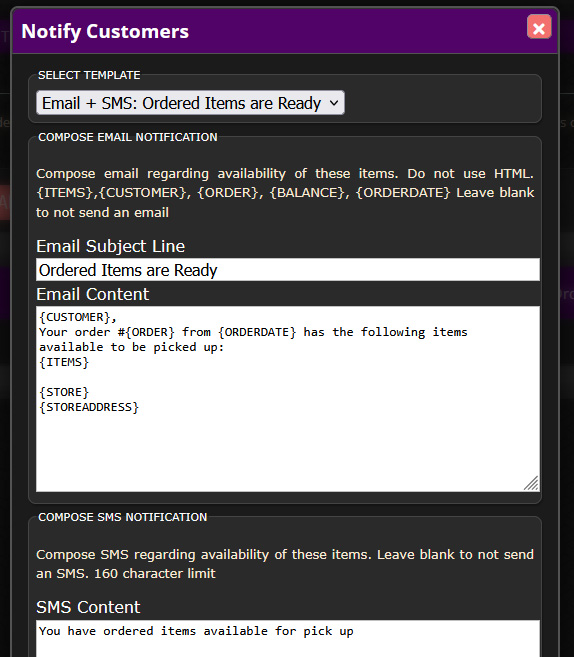
You can notify customers right from the POS! Simply check the box for each order (shown above on the left) and click Notify. You’ll then have the ability to type an email and/or text message to send to the customer so they know their items are ready.
Stock Orders and Shipments
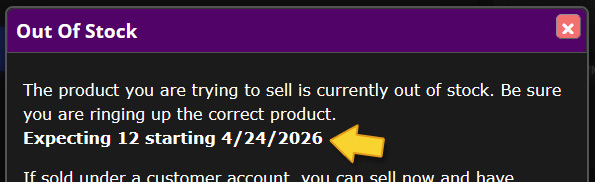
A useful component of pick-up orders is properly logging when product is bought from a vendor so that the system will know exactly how many of that product is on its way and when it is set to arrive to your store. This allows staff to convey an estimate date of arrival for the product(s) the customer is buying.
Logging pick-up orders also keeps staff informed about reserved pending stock that will be taken out of shipments that arrive.
To log a vendor order, click the Order Placed button on the Inventory Control pop-up (accessible from various screens in the POS).
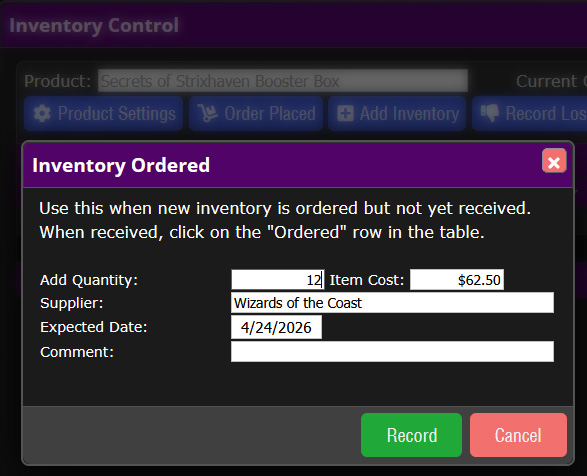
It’s also common to find this Inventory Control pop-up by going to Tasks > Reorder List. There, you will see the product listed, along with how many are reserved for customers as the result of a product pick-up, how many you currently have on order, and, if you haven’t ordered any yet from your vendor, how many you currently need.

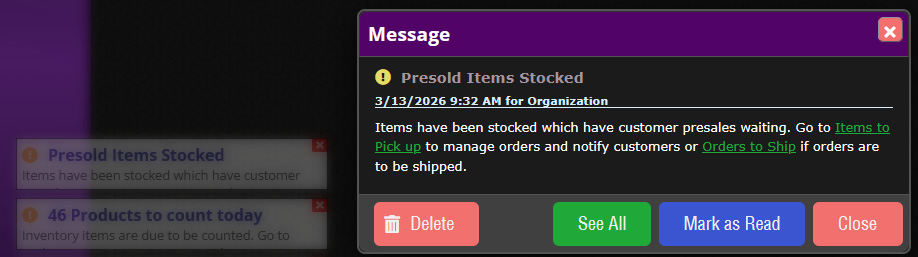
When the shipment arrives, you can mark it as received through Tasks > Shipment Received.

As soon as the item that is owed to a customer is in stock, the system will automatically alert your staff that customers are waiting for those products, making it easy to notify them and complete the pickup.
We hope that this article has helped you gained extra insight into the process of creating and managing pick-up orders. For more help using this feature, see the Help topics for Layaways found in the POS. Click the help button in the upper right and search for “Layaways” to see all relevant topics. If you have any questions, please don’t hesitate to reach out to our team!